When we start to code for any project it is important to keep track of all our project versions and changes in source code files. Hence, knowing how to use git is important. This is a beginner friendly article to help you with basic workflow of git.
How Git works?
Suppose we have a project. Its first version has file1 and file2. Git stores these two files as snapshots. Now as part of Second Version of the project, we modified file2. Now git will not store the file1 again. Instead, it will just refer to file1 snapshot from version1 as "version2 file1" is identical to "version1 file1". And as file2 is modified, it will store file2's snapshot. This way git keeps track of versions of the project.
Git has main 3 states in which file goes through:
- Modified: A file is modified when we modify it but did not store it to local database.
- Staged: A file is staged when we marked a modified file in its current version which is ready to store into local database.
- Committed: A file is committed file when we safely store it in local database.
These states lead to 3 main sections:
Working tree: This is your git directory, where you copy files(of current version) from remote repository and use or modify to make changes for next version.
Staging area: It is a file in your git directory, that stores modified files which we want to store into local database.
Git directory: It is kind of a folder which stores the information and files of your project.
Basic workflow in git:
- We modify files in working tree.
- Selectively stage just those changes which we want to be part of our next version.
- We do a commit, which takes files from staging area and stores as snapshots permanently in Git repository.
In short:
- If particular version of a file is in git directory, it is considered as committed
- If it has been modified and added in staging area, it is called as staged
- if it is changed since its last checkout and has not been staged, it is modified
Go through below steps to use git in command line:
If you have your project repository in github and you want to update your code in your system and push the code changes again to your github account, that's when git commands can be used.
Install Git: You need to install git in your machine before using it. Open the terminal window and type below command for ubuntu/debian:
$ sudo apt install git-all
for other OS please click here to check out the commands.
Login in Git: The first thing you should do when you install Git is to set your user name and email address.
$ git config --global user.name “DummyUsername”
$ git config --global user.email “demoEmail@mail.com”
You can always check if your information is saved. Use gedit command. This will open a text file having username and email id.
$ gedit .gitconfig
Create Git Directory:
You will need a workspace(New folder) to copy your github repository in your machine. So we are going to use mkdir command to create workspace. We will make newly created workspace as current directory to proceed.
$ mkdir DummyName
$ cd DummyName/
If you already have a project directory and you want to start controlling it with Git, you first need to go to that project’s directory and initialise it with git.
$ cd ProjectDirectory_path
$ git init
Clone Remote repository:
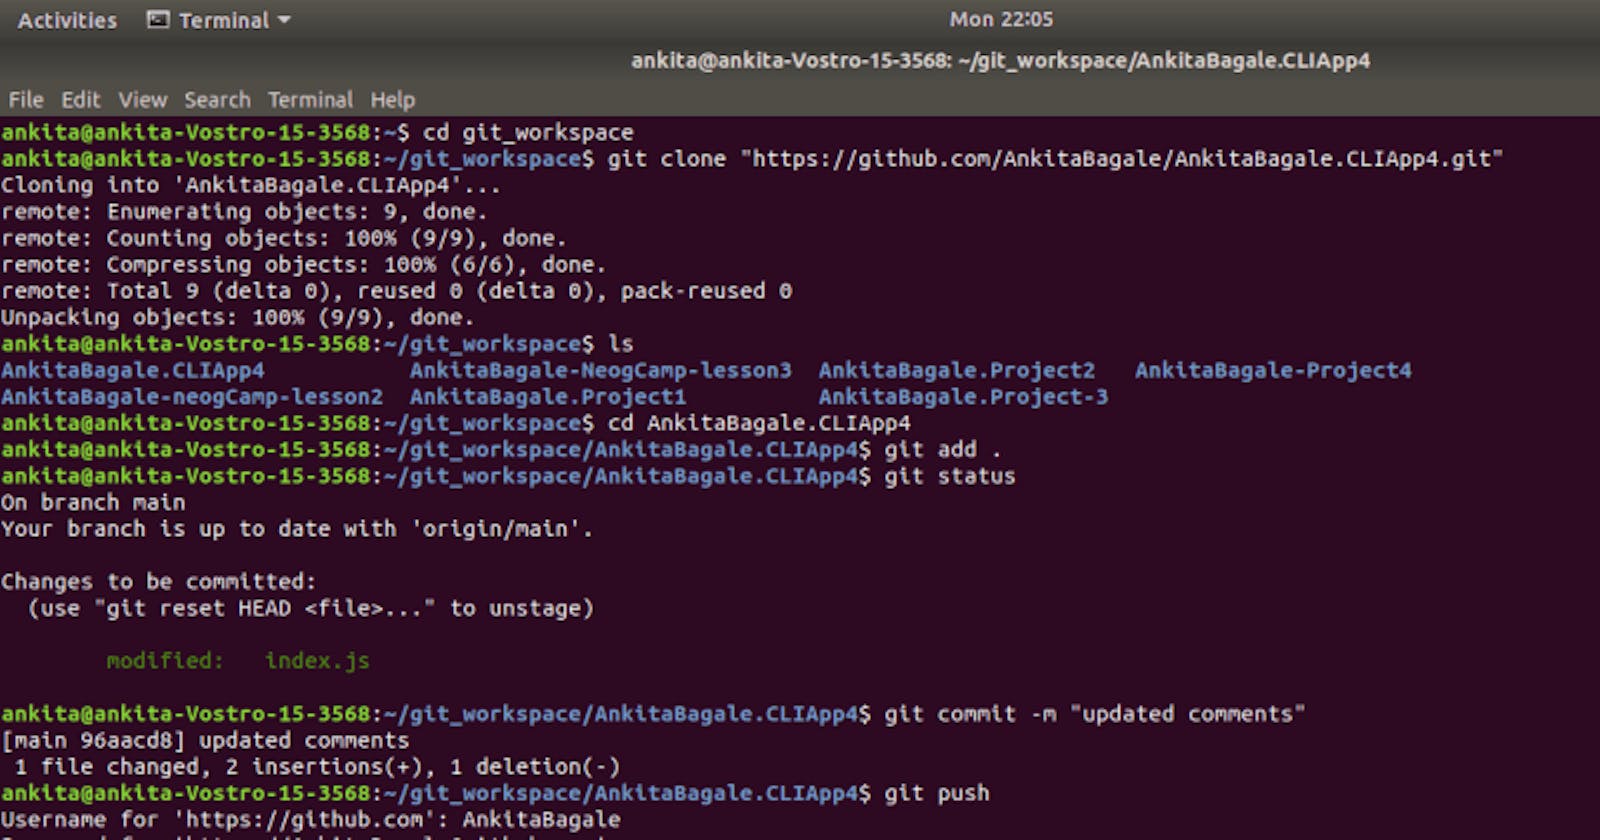
To work on your project present in github account, you will need to get a copy of your project's git repository in your system. For this, use Clone command to copy repository in your workspace.
$ git clone “Enter here url of your remote repository”
You can check that new folder with project's repository name is created inside the workspace folder by using ls command.
$ ls
Make our newly created repository folder as current directory to proceed.
$ cd DumyRepoName
You are ready to code now. You can open the folder(newly created repository in workspace) in code editor. You can create/update your files and write/update your code. This code will be saved in your desktop only. When we are done with the coding, we will want to update code in our github account.
Final Step: add, commit, push
Using a add file_name command you can add your code changes to staging area. This command states that you want to include file_name's changes included in your next commit.
$ git add .
. is used to include all files
You can use status command to check the files state.
$ git status
Use commit command to commit the code with comments. This will take files from staging area and store the files snapshots in git repository using git push command.
$ git commit -m “your comment goes here”
$ git push
Yay! We have our files updated in git repository. It was that easy if we understand the concepts and git commands.
I will recommend you to go to official documentation and always use git help command for more information:
